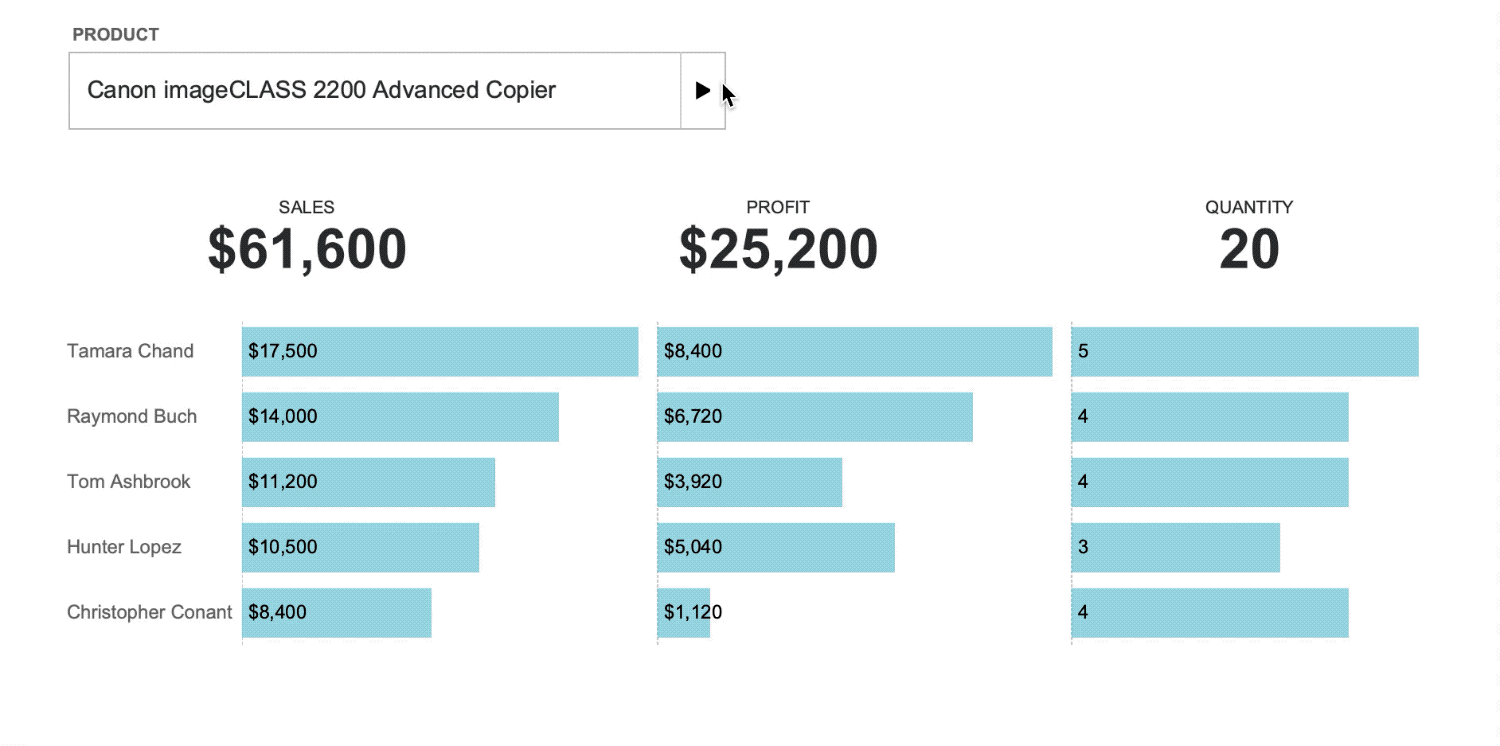
In a previous post, I wrote about how to create a custom dropdown using parameter actions and show/hide container buttons, as seen in my IronViz.

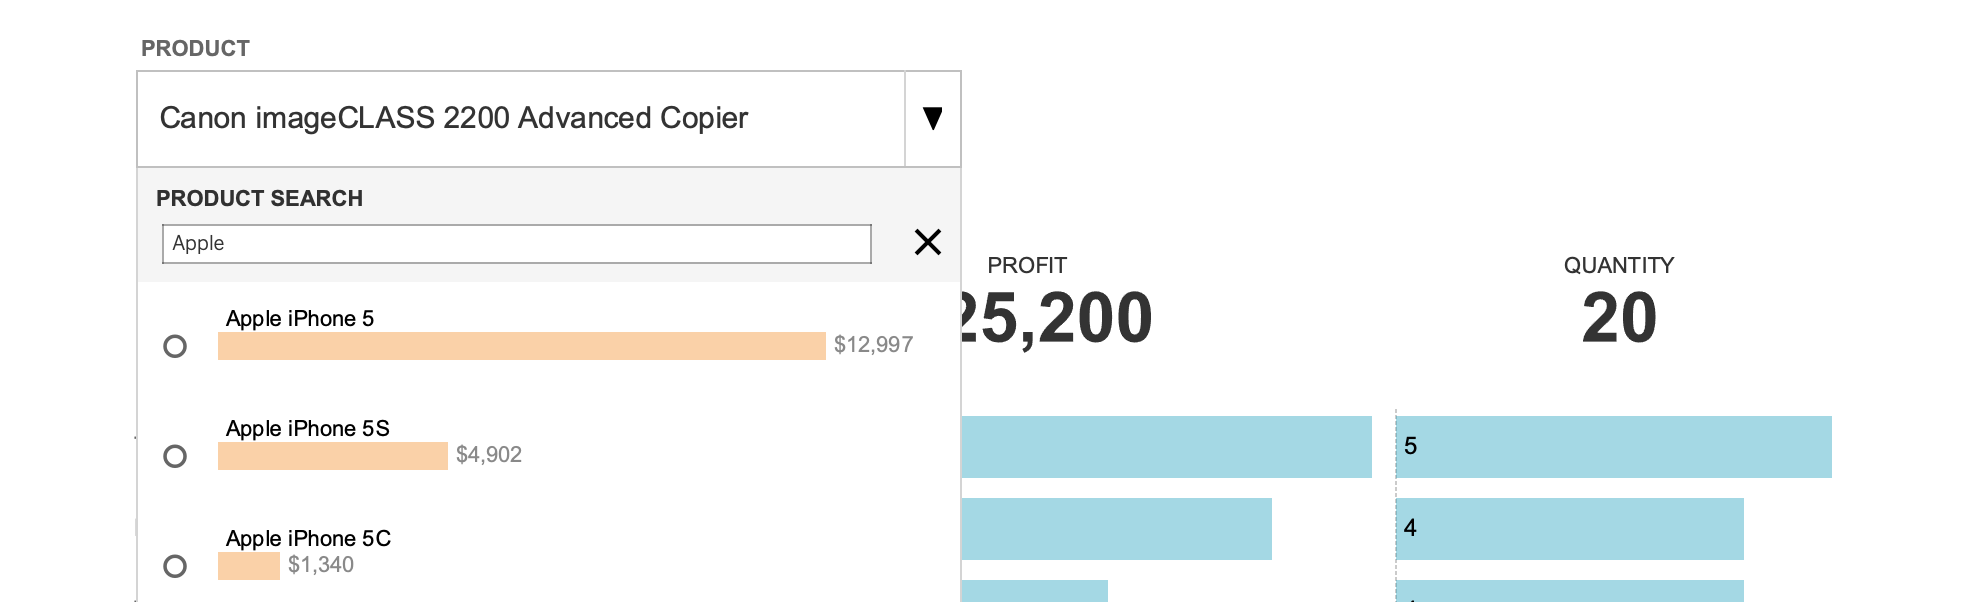
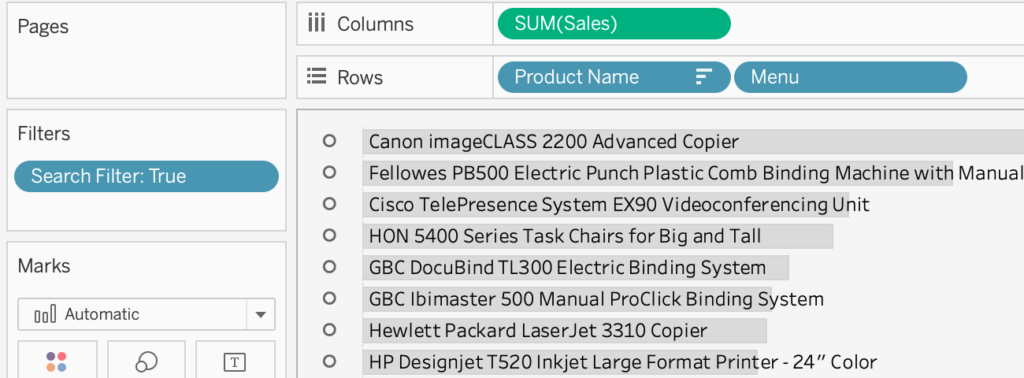
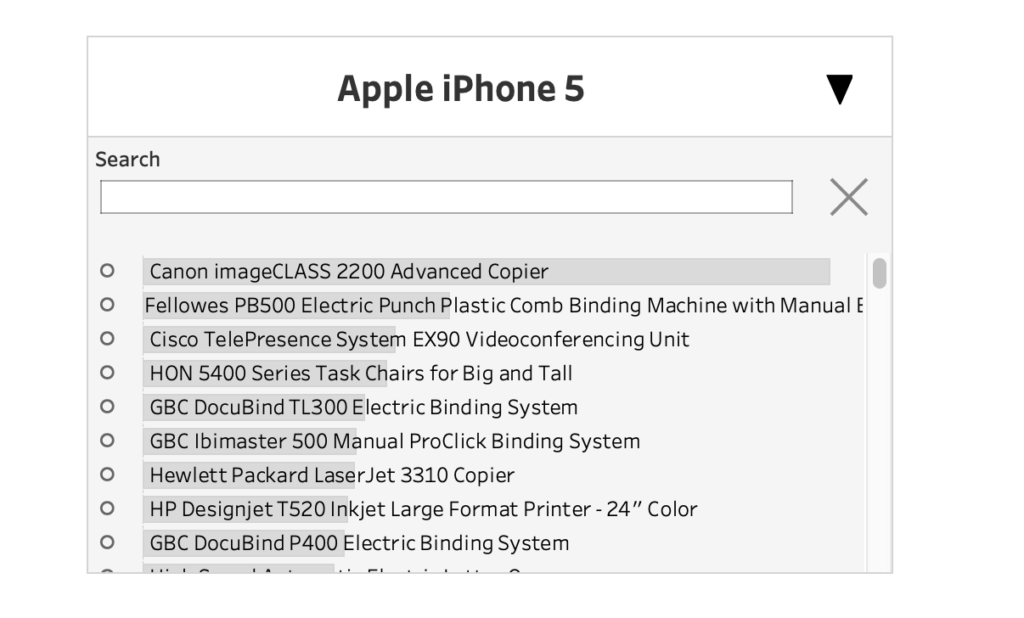
However, I got to thinking, the list of values that appears is LONG. Having them sorted greatest to least by number of locations certainly helps, but what if there is a specific value I want to find? How would I know where it is?
One of the drawbacks of parameters has always been that they do not provide a search function similar to filters. So, I decided to set out on the quest to figure out how to add one into my custom menu.
- Complete all steps here, as this is the starting point for this tutorial
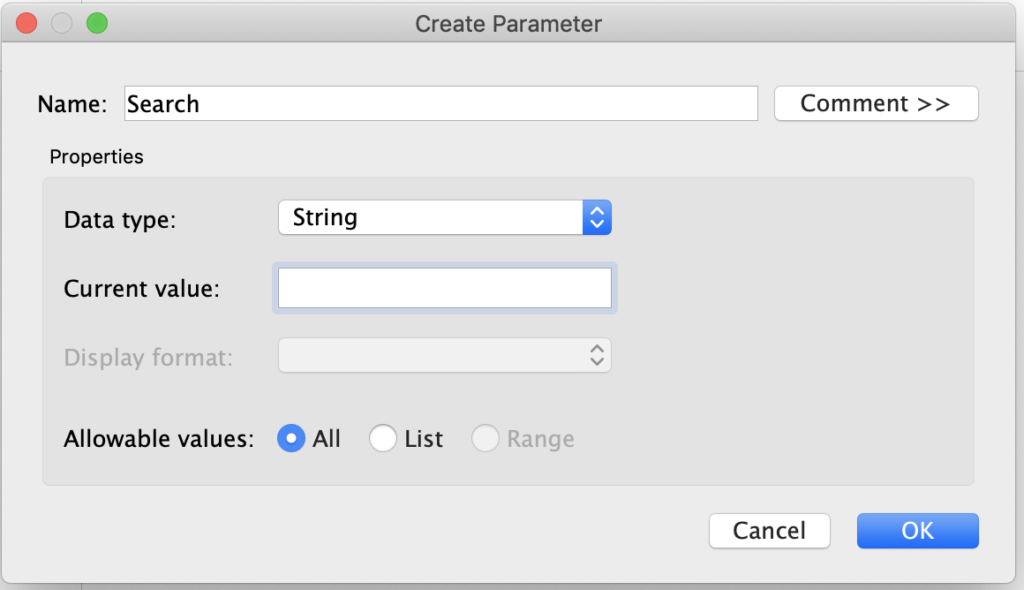
- Create a new parameter called Search. Change the data type to string, the current value to nothing (just delete the text that is there), and the allowable values to all.
- Create a new calculated field called Search Filter. This will be used to filter the list of values that appear.
CONTAINS([Product Name], [Search])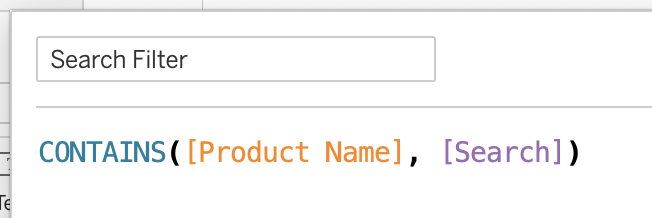
- Add the Search Filter calculation as a filter to the worksheet with the menu options (bar chart) and set it to true.
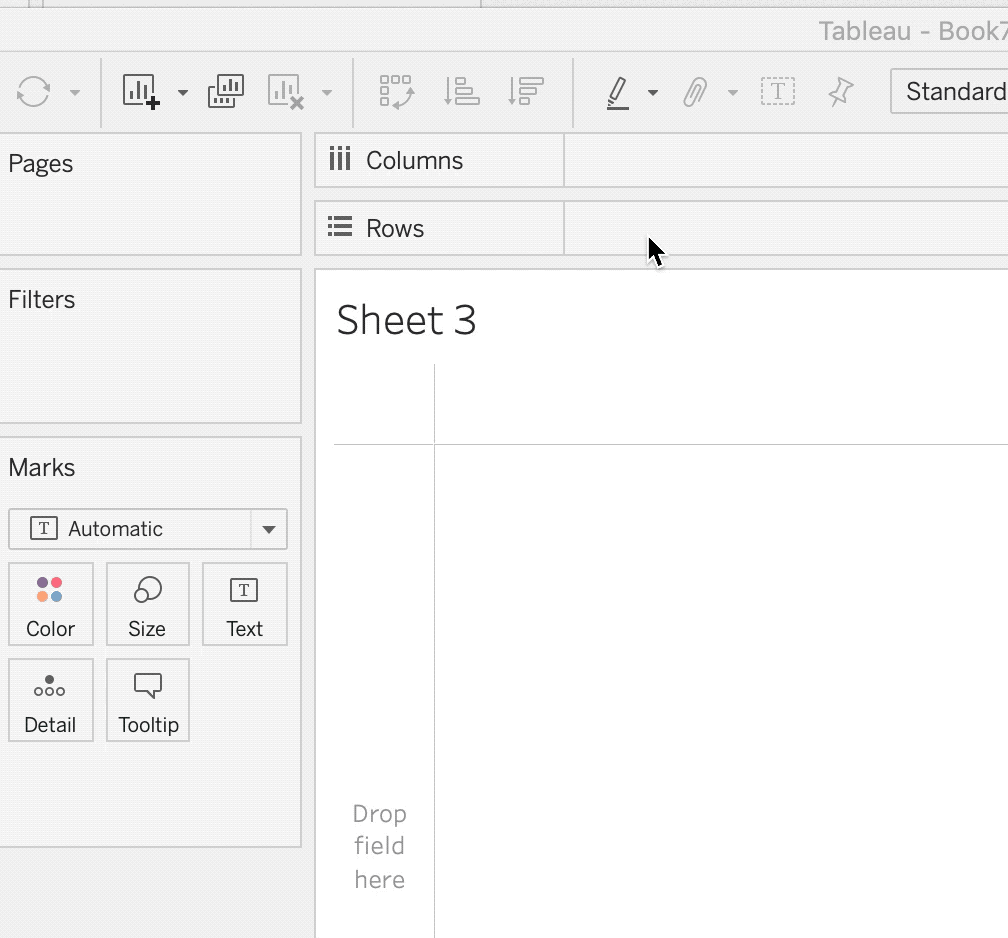
- Create a new worksheet. Either double click on the rows shelf and type in MIN(1) or create a calculated field with MIN(1) as the value. I prefer double clicking to add because it’s less clicks and the calculation won’t be added to the measures/dimensions shelf. However, either method works!
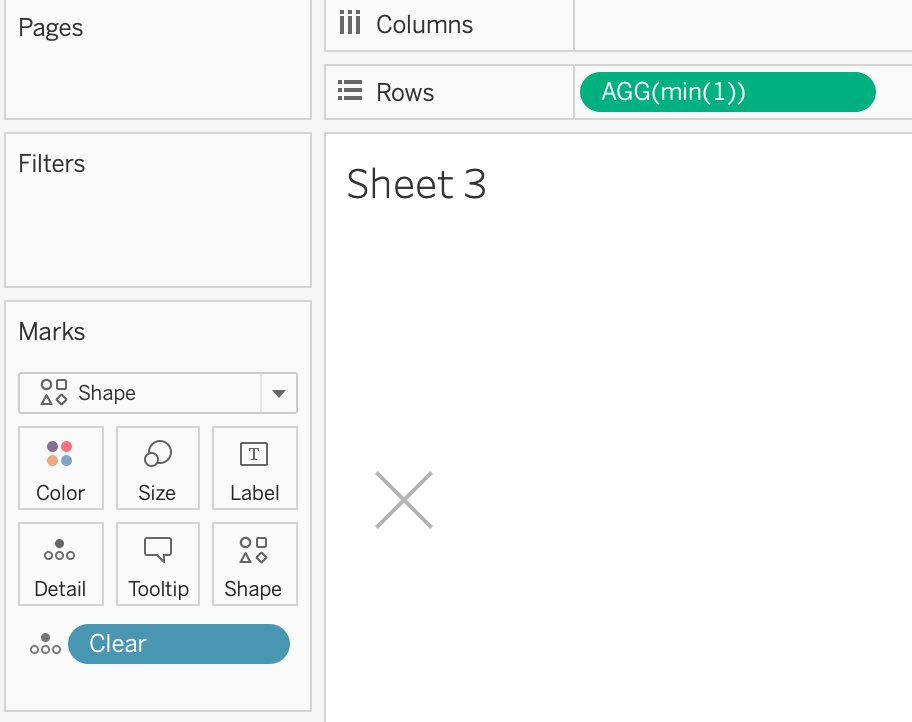
- Create a new calculated field called Clear that is just double quotes “”
- Change the mark type of the worksheet to shape. Change the shape to an “X” or some icon to represent clearing the search parameter. Then add clear to the detail mark. Finally, clean up the worksheet by changing the color of the X to grey, uncheck show header, hide tooltips, and remove zero lines/gridlines/dividers.
- Go to the dashboard and assemble it! I added the search parameter and X into a horizontal container and added it above the bar chart options. I then changed the background color to a light grey to match the bar chart and added outer padding to the top/bottom of the X in order to make it align with just the part of the parameter you type in (and not the title).
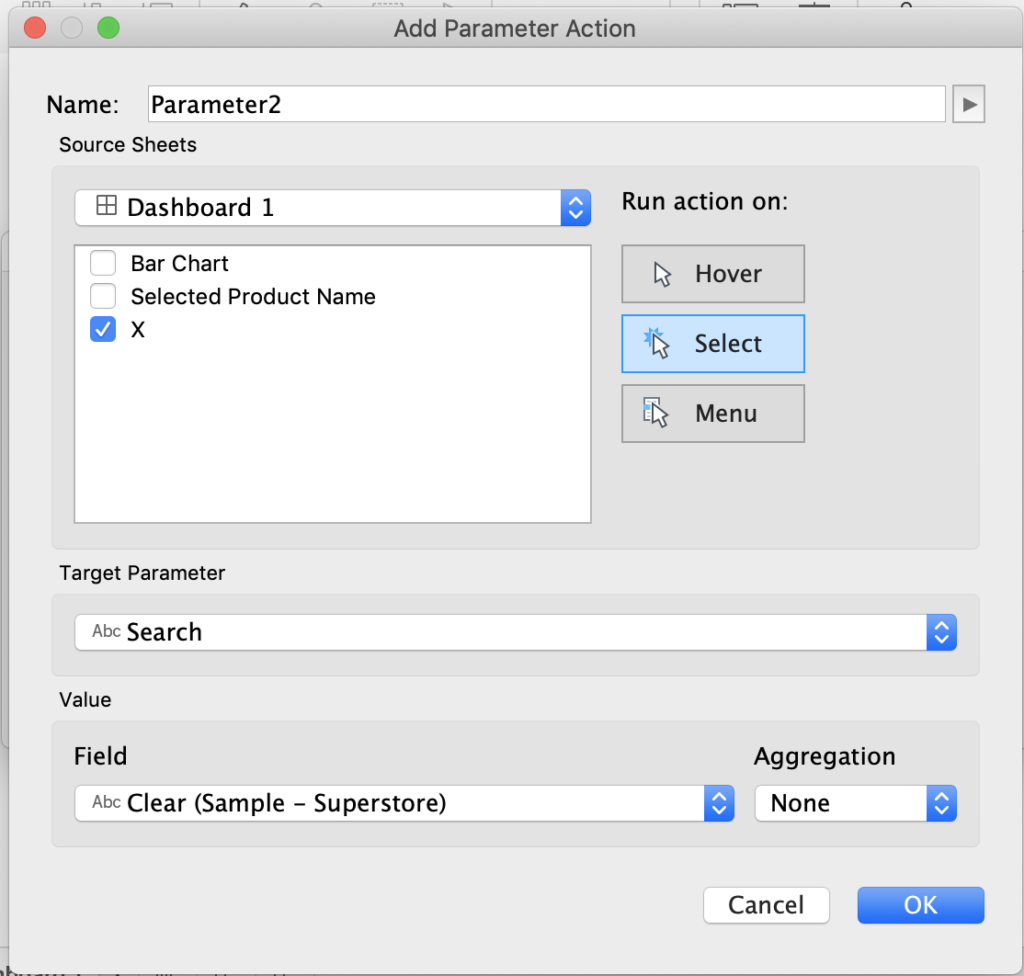
- The last step to make this work is to add a dashboard parameter action to make the X clear the parameter. Go to dashboard > actions > add actions > change parameter. Set the action to run on selecting of the X worksheet. We want to target the “Search” parameter and update it with the clear (which is empty text) calculation.
Done!
One thing worth noting – in order for the search to run, the user has to hit the enter key on their keyboard.
